

Create and Configure Your Staking Contract
Follow these steps to deploy a UBE staking contract on Pulsechain, link your token, define APY, minimum stake, penalties, accept ToS, and deploy.
1 Copy Your Token Address
Copy the address of the token you want to use for staking. This token will be staked by users and distributed according to the contract rules.
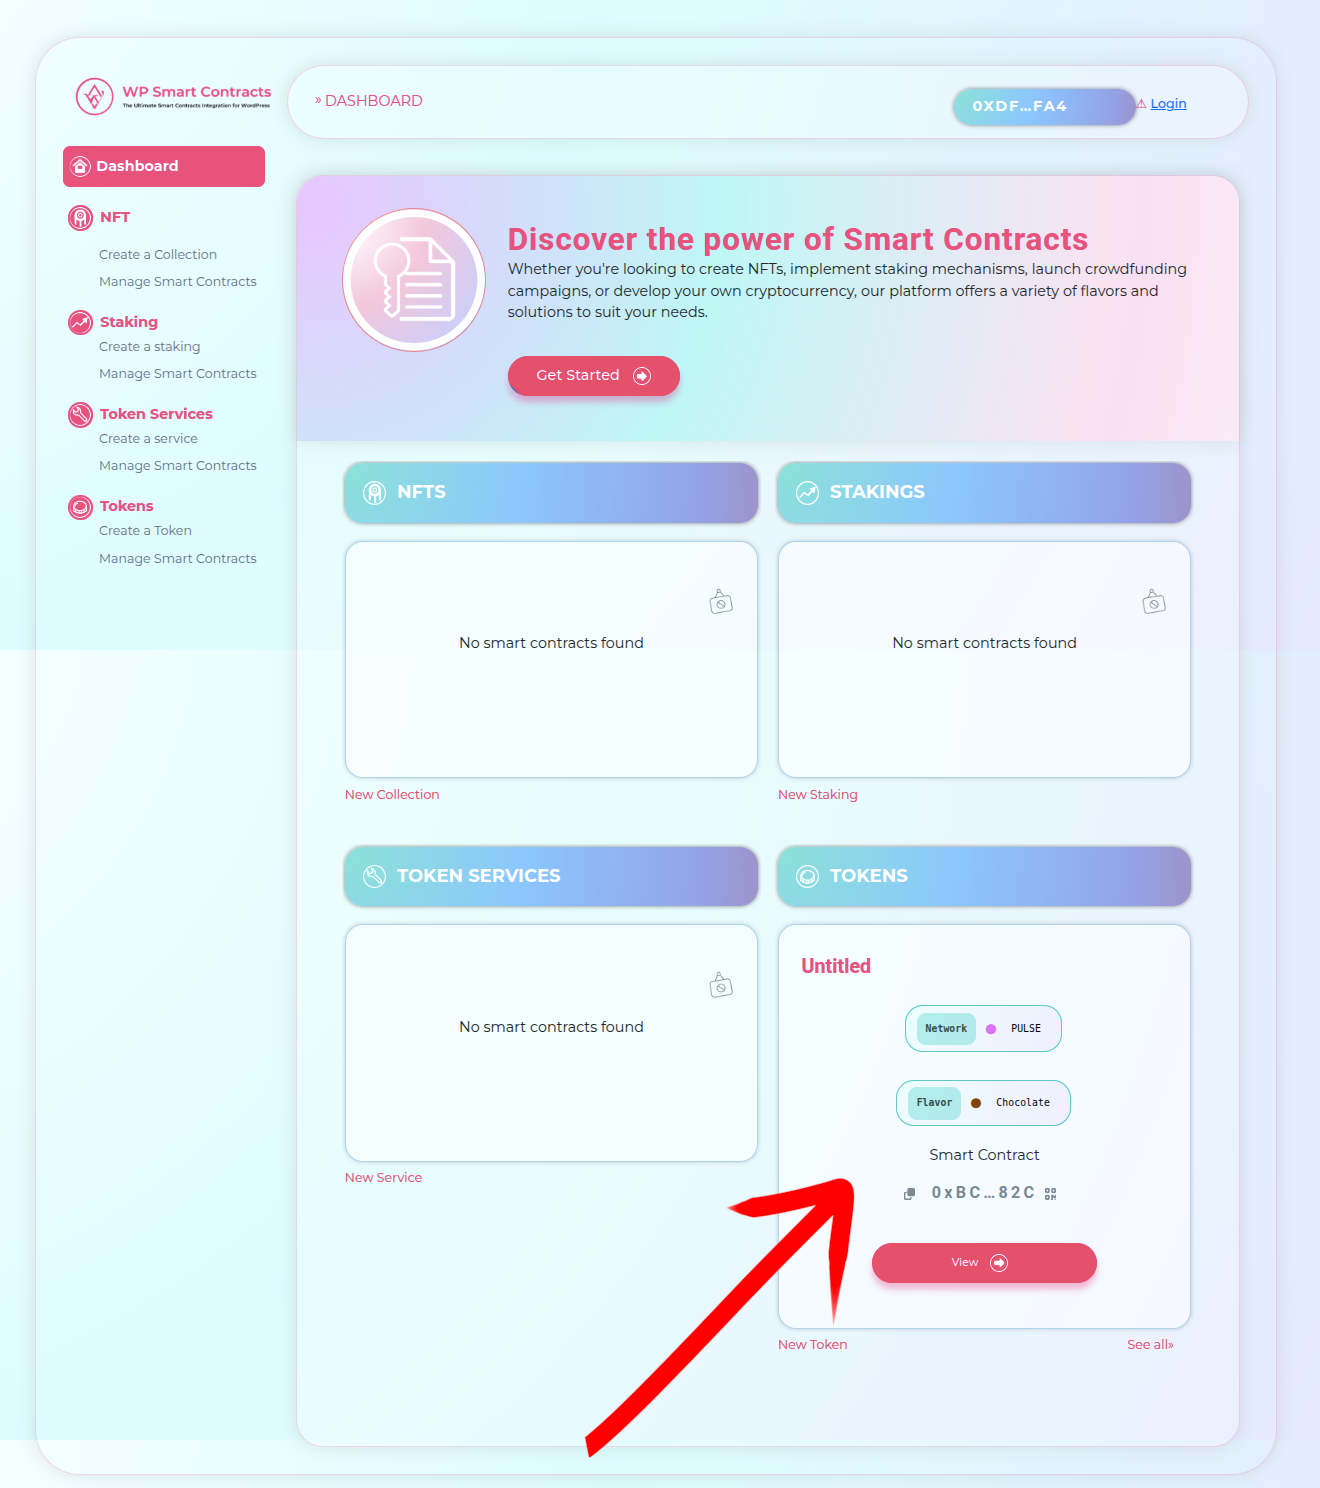
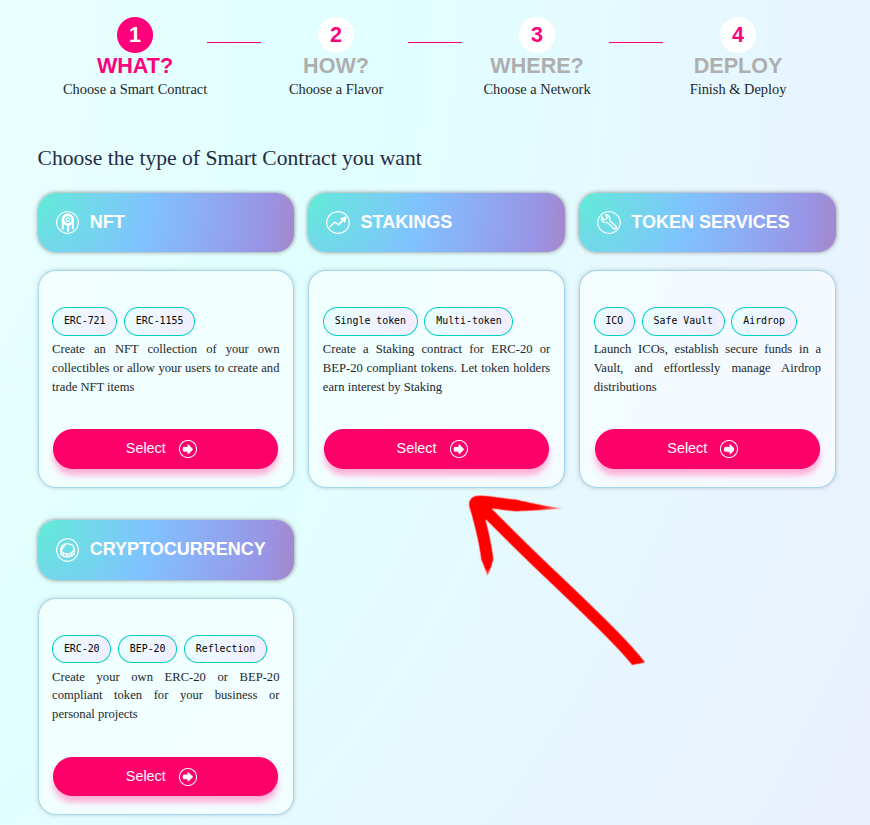
2 Select Staking Solutions
From the launcher dashboard click Get Started and select Staking Solutions. This opens the staking deployment wizard.
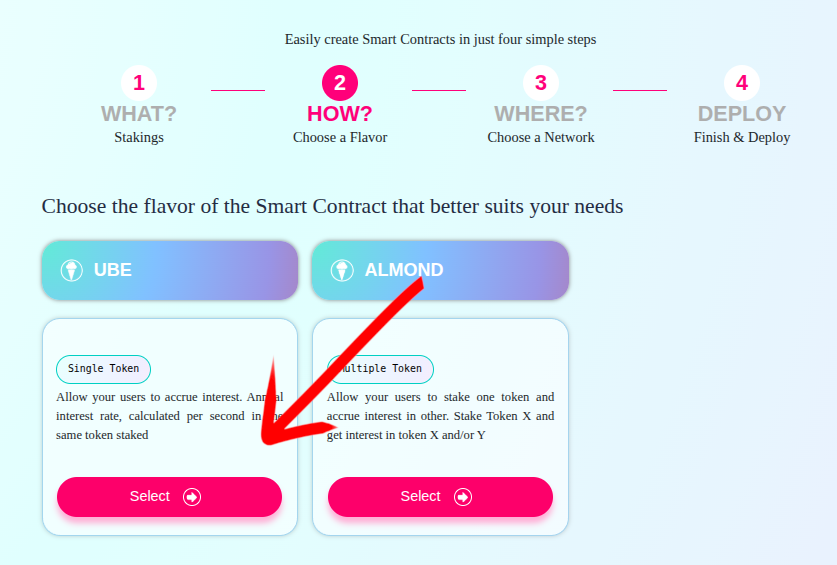
3 Choose UBE (Staking)
Choose the UBE staking flavor. This selection allows future linking with your ICO so purchased tokens can be distributed directly to staking.
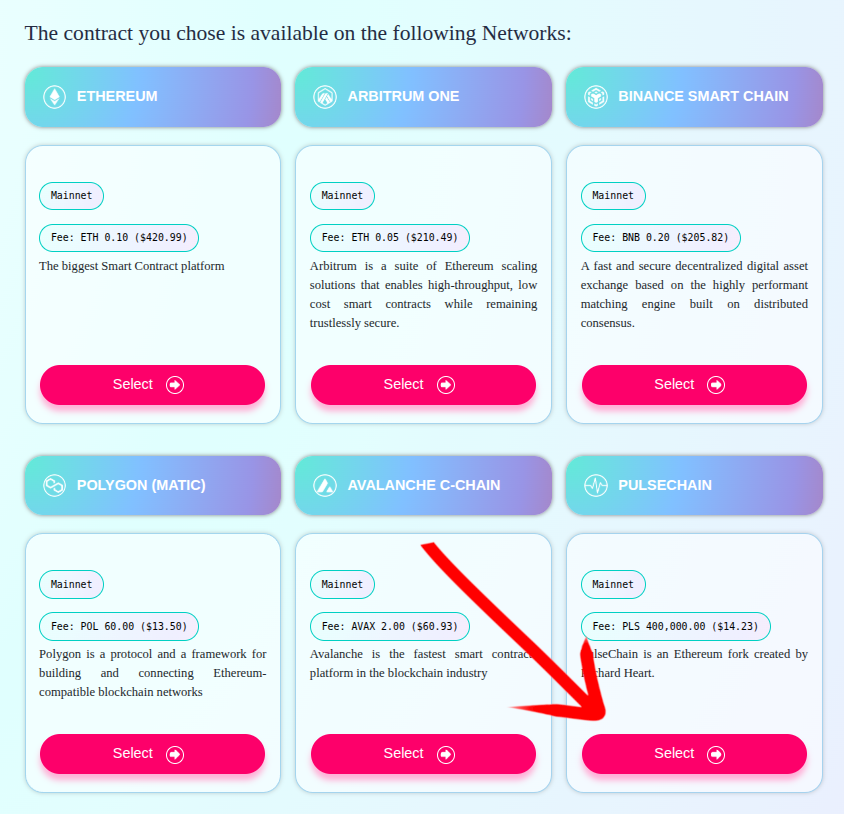
4 Select Network
Select Pulsechain as the target network. Ensure your wallet is connected to the same network.
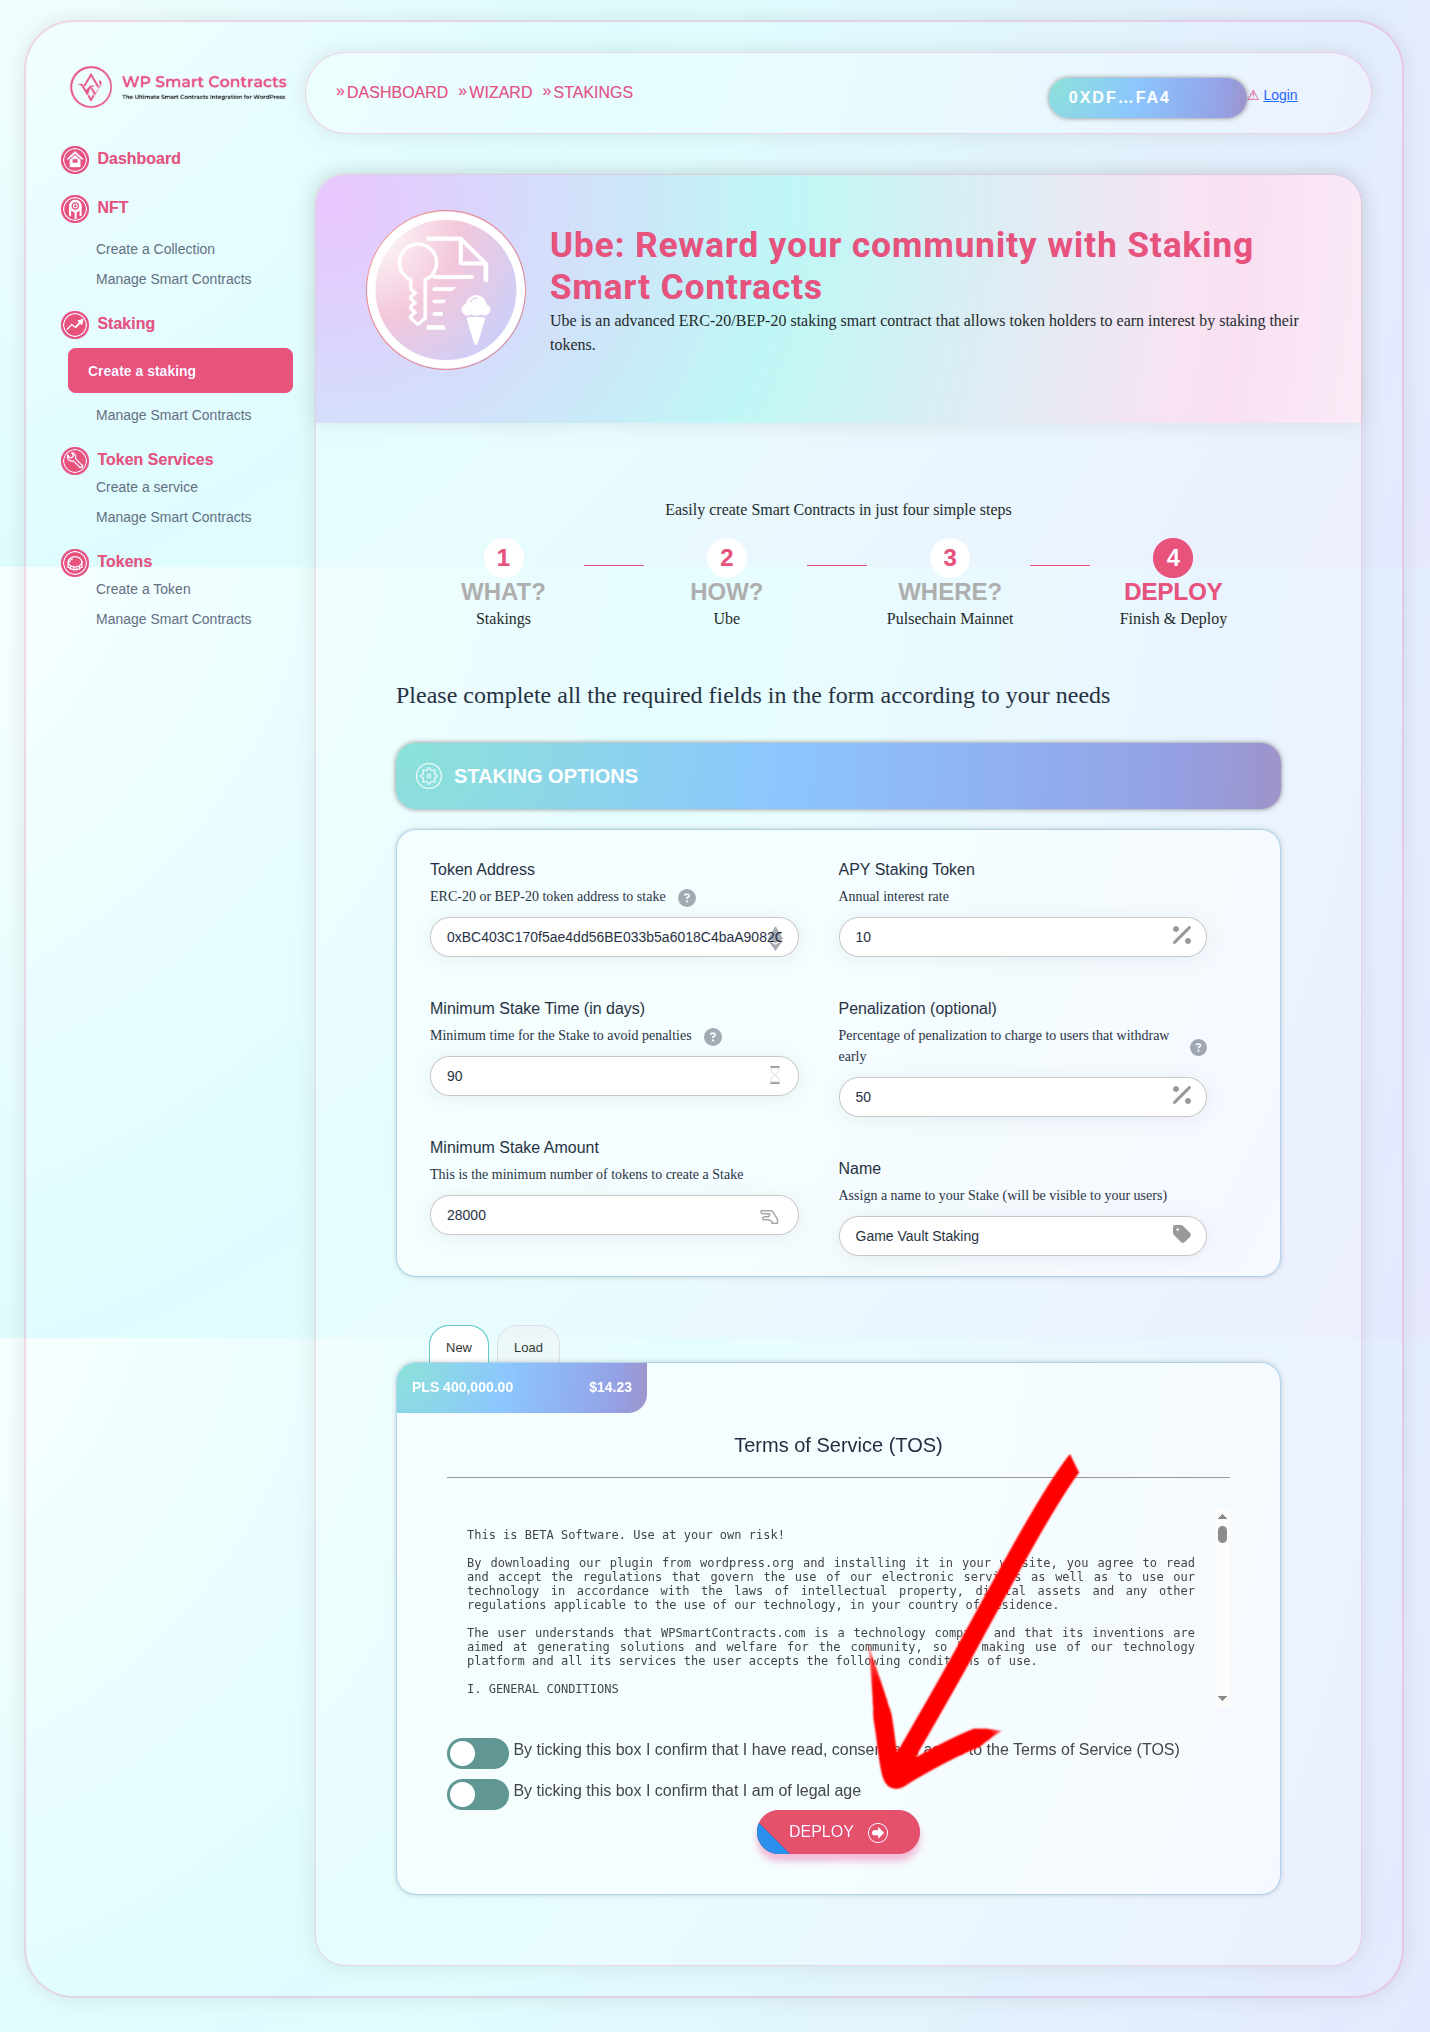
5 Configure Staking Parameters
Paste the token address, set the APY, Minimum Stake, and Penalization (early withdrawal penalty). Read and accept the ToS, review the deployment fee, then click Deploy.
6 Confirm in MetaMask
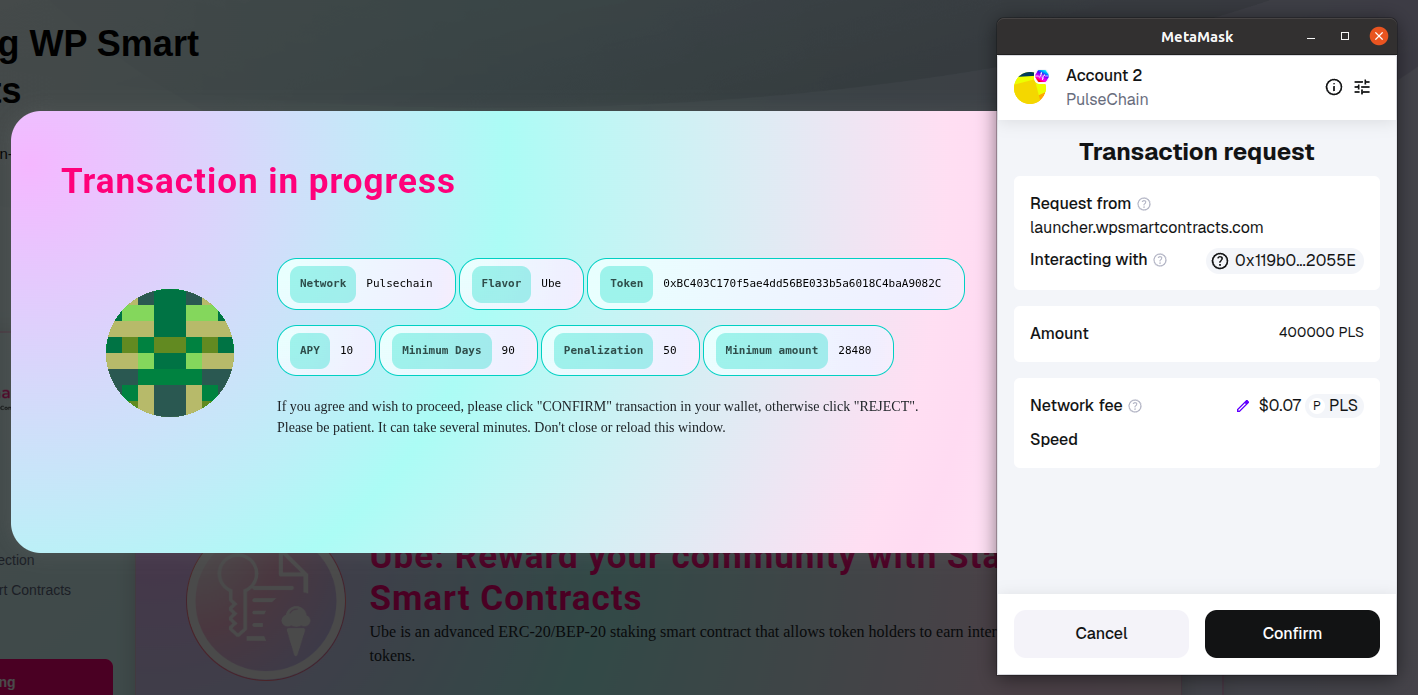
Review the parameters and confirm the deployment transaction in MetaMask. Wait for the transaction to be mined.
8 Contract Deployed and UI Available
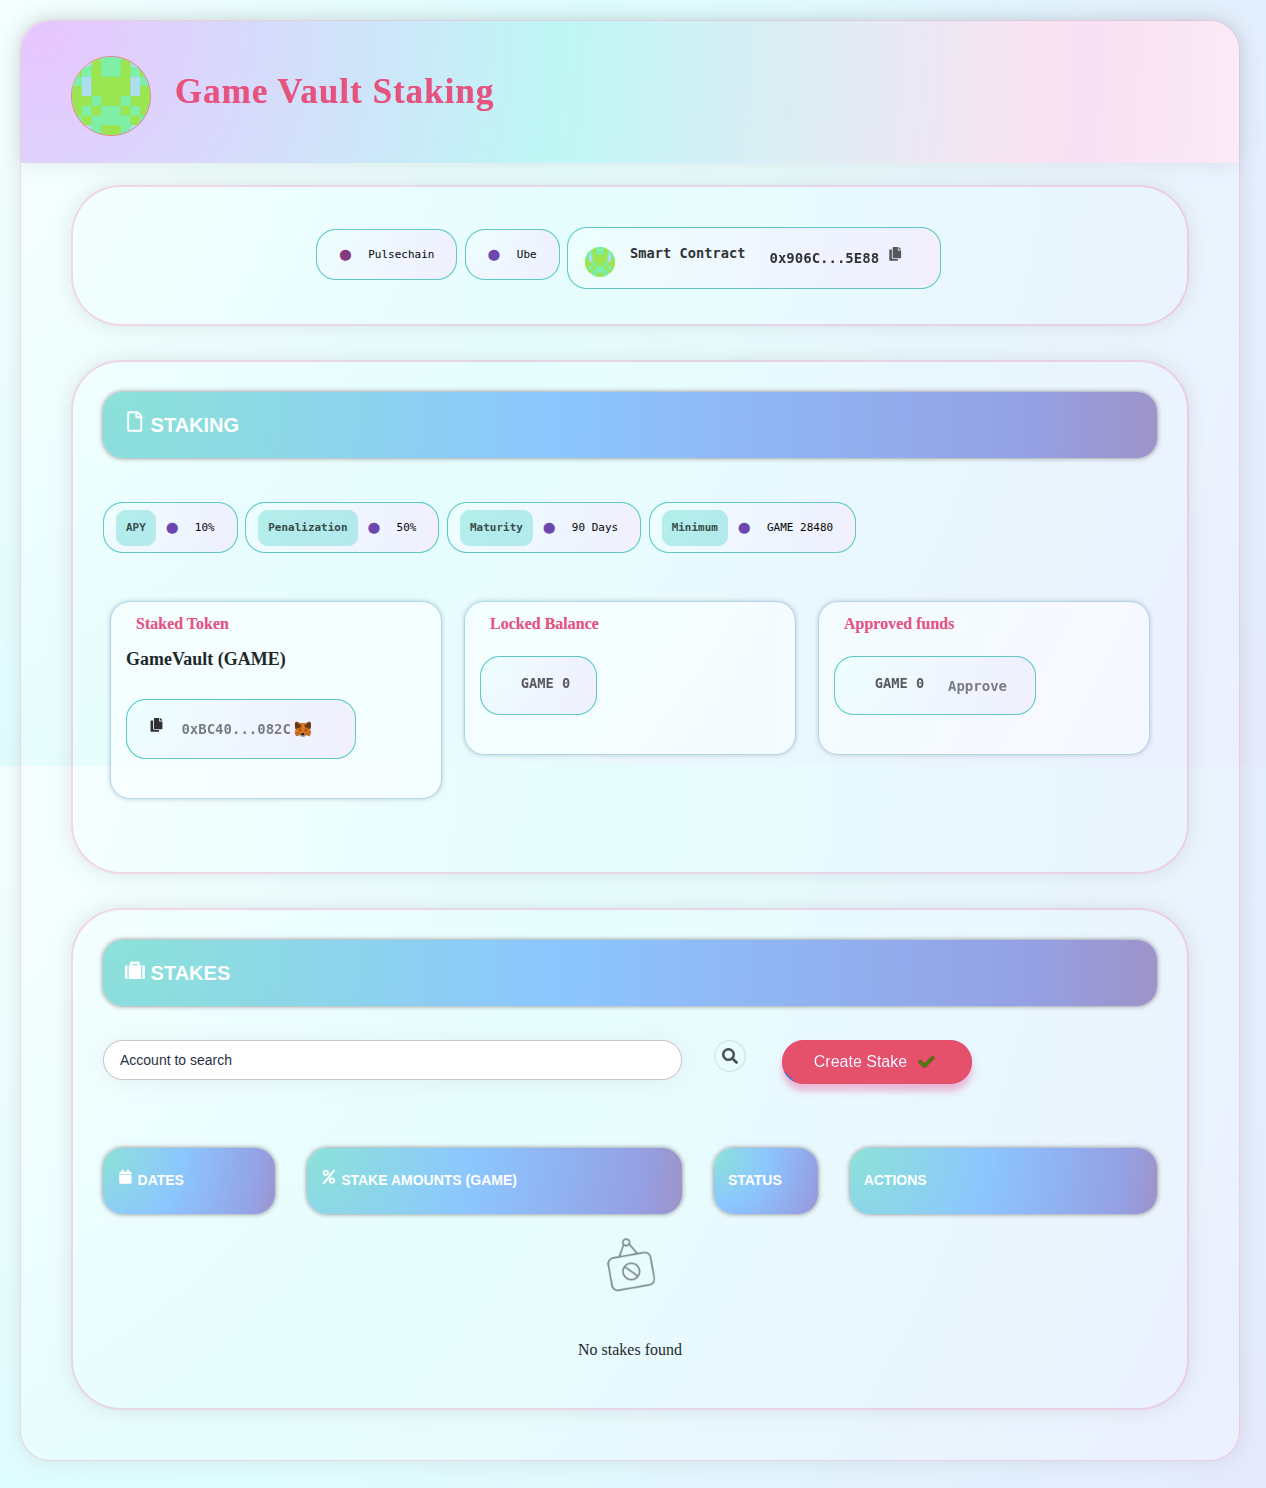
Once the transaction confirms, the staking contract is deployed and its UI becomes available. You can share the staking page URL with your community.
Create a Stake
Now create an individual stake from the deployed staking UI by clicking the Create Stake button and confirming transactions.
9 Select Stake Amount
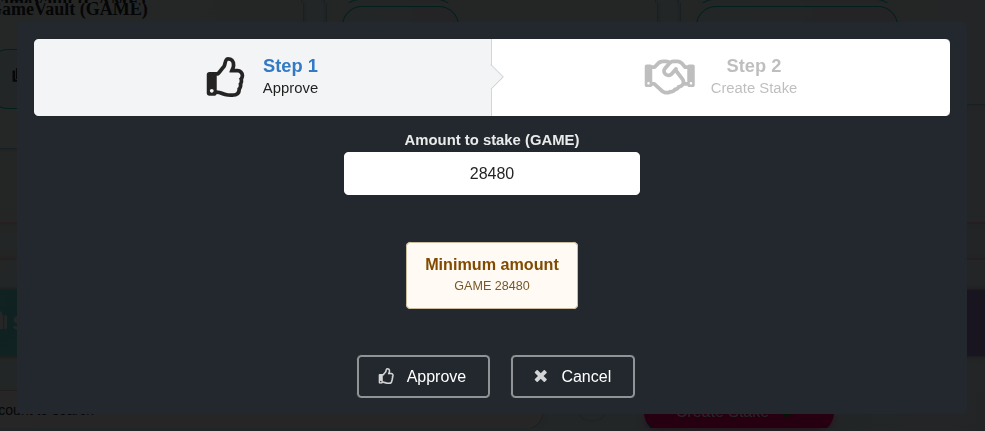
Click Create Stake and enter the amount you want to stake. Ensure you have enough balance and the correct token selected.
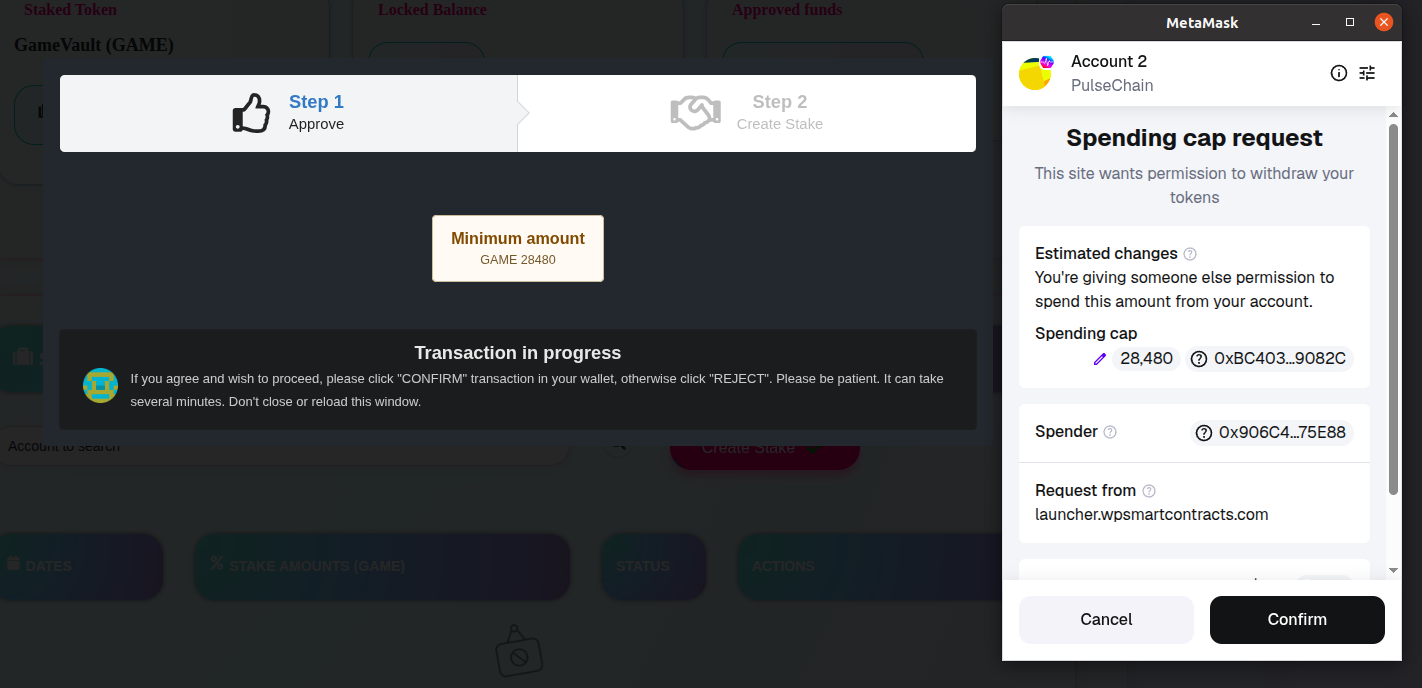
10 Approve and Confirm
Confirm two transactions in MetaMask: the first approves token spending, and the second creates the stake on-chain.
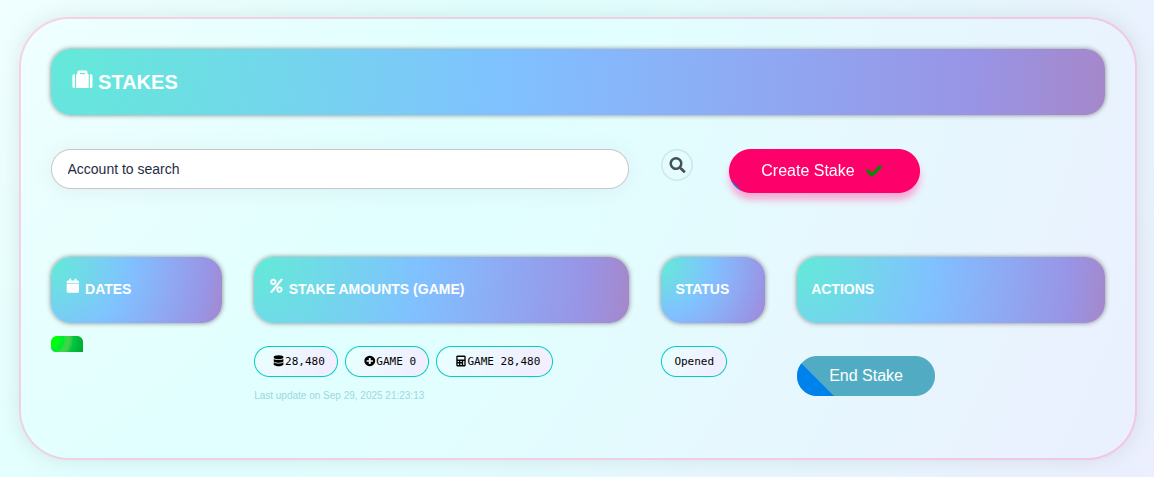
11 Stake Listed and Accruing
Your stake appears in the list showing the staked amount, current accrued rewards, and an option to end the stake according to the contract rules.
End-to-End Smart Contract Development
Need something the flavors don’t cover? Suika Labs, the company behind WP Smart Contracts, delivers professional blockchain solutions with a proven track record since 2019.
- Full-stack blockchain development
- Oracle integrations & DeFi protocols
- UI design & deployment support